Need Help
Setting up
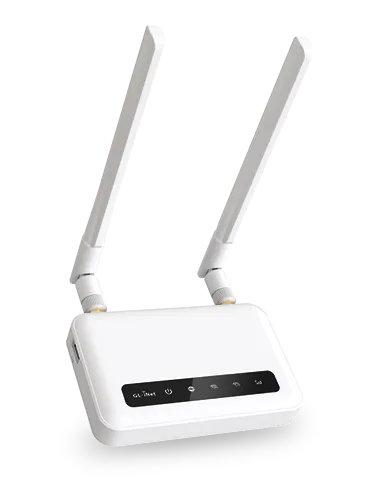
SPITZ X750 4G CAT 6 ROUTER

How Do I Change My Wi-Fi Name and Password?
A Simple Guide from SilverLink Internet
Changing your Wi-Fi name and password is a smart way to keep your internet secure and make your network easier to recognize. Here's how to do it in just a few simple steps!
Why Should I Change My Wi-Fi Name and Password?
Better Security: The default password is the same for many users. Changing it helps stop unwanted users from connecting to your internet.
Make It Personal: Use a name like “SmithFamilyWiFi” or “GrannySueInternet” so you can find your network easily.
Stay in Control: If someone you no longer trust has your password—or if you’ve had a lot of guests—this gives you a fresh start.
Improve Connection: Sometimes, changing settings can help avoid interference from other networks nearby.
Step-by-Step: How to Change Your Wi-Fi Name and Password
Step 1: Plug in with an Ethernet cord
►Plug one end of an ethernet cord into your computer or laptop.
►Plug the other end into the LAN port on your SilverLink modem/router (it’s the port closest to the power plug).
Step 2: Login to Your Router
►Open a web browser (like Chrome, Safari, or Edge).
►In the top bar (where you type website addresses), type:
192.168.8.1
►Then press Enter on your keyboard.
►If it asks for a username and password:
Username: root
Password: 1234554321
Step 3: Change Your Wi-Fi Name and Password
►On the left-hand menu, click WIRELESS.
►Click Modify under the 2.4GHz settings.
►Change the Wi-Fi Name (SSID) to something easy to remember (like “SmithWiFi”).
►Change the Wi-Fi Key (that’s your password) to something strong but simple for you (like “Grandma2024!”).
►Click Apply to save your changes.
✦Repeat these same steps for the 5GHz settings listed below the 2.4GHz section.
Step 4: Restart Your Router
►Unplug the power cord from the router.
►Wait 10 seconds.
►Plug it back in.
✦This makes sure all your changes take effect properly.
Your Done!
Now your internet has a name and password that you chose. It’s safer, easier to recognize, and ready to go!
Need Help?
If any part of this is confusing or you just don’t feel comfortable doing it yourself, call SilverLink Internet Support at 888-214-4130.
We’re happy to walk you through it!

